Customizing your screen
Docking Elements
The user interface has been built up to give user maximum control over the screen.
Because of that, all the elements can be docked where you want them.
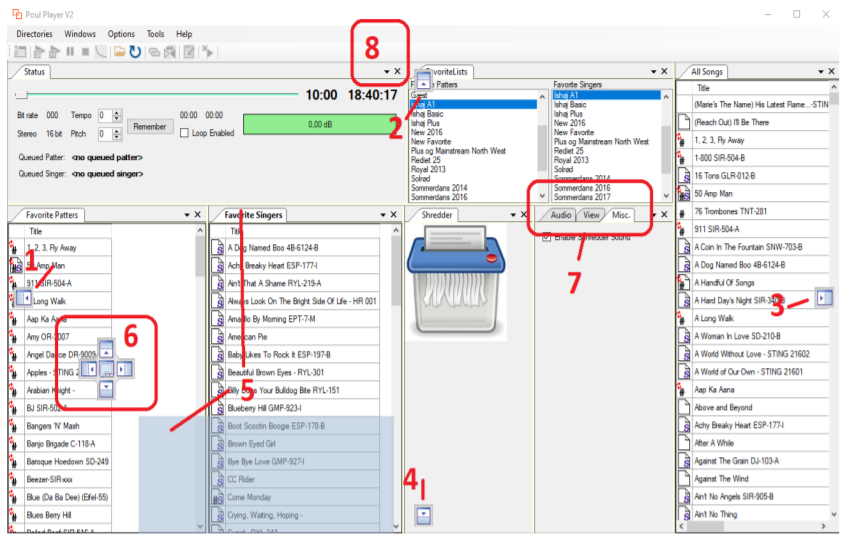
Take a good look on this screenshot and look after the picture...

- Icon for docking to the left. Drop the element over this icon and the window element will dock to the left
- Icon for docking to the top. Drop the element over this icon and the window element will dock to the top.
- Icon for docking to the right. Drop the element over this icon and the window element will dock to the right.
- Icon for docking to the buttom. Drop the element over this icon and the window element will dock to the buttom.
- The shadow indicates the window element being dragged to a new docking position. In this case the window element is the Favorite Singers list. As you drag it along, the docking icons will change. To start dragging, you click and hold on the window element tab.
- Icon for docking on another dockable window.
a. The center icon, is the icon used to dock the dragged window element directly on the other element. The two elements will occupy the same space, size and position and will show up as tabs
b. The other four icons act the same as 1-4 above, except that the docking will not be relative to the external window, but instead relative to the window element under the mouse. - This is three window elements sharing same space, size and position. They are selectable by clicking on the tab.
- If you want to remove a window element, you close it by clicking on the X to the right of the title.
- Following window elements are default. They can be moved but not deleted
- All songs
- Favorite List Selector
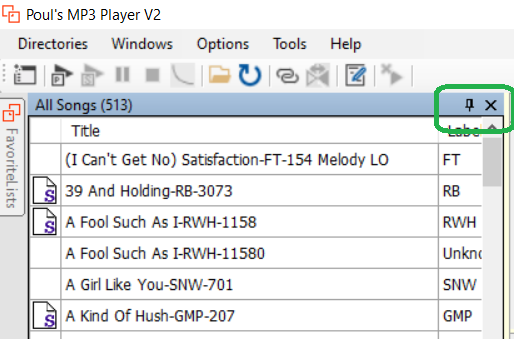
This is an example:
This window (All Songs) are docked to the left side of the screen. (option 1)


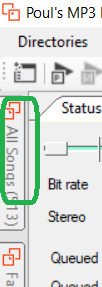
If you click the little needle, it will be hidden in the left panel.
It will show up again when you get the mouse over it...
Created with the Personal Edition of HelpNDoc: News and information about help authoring tools and software